
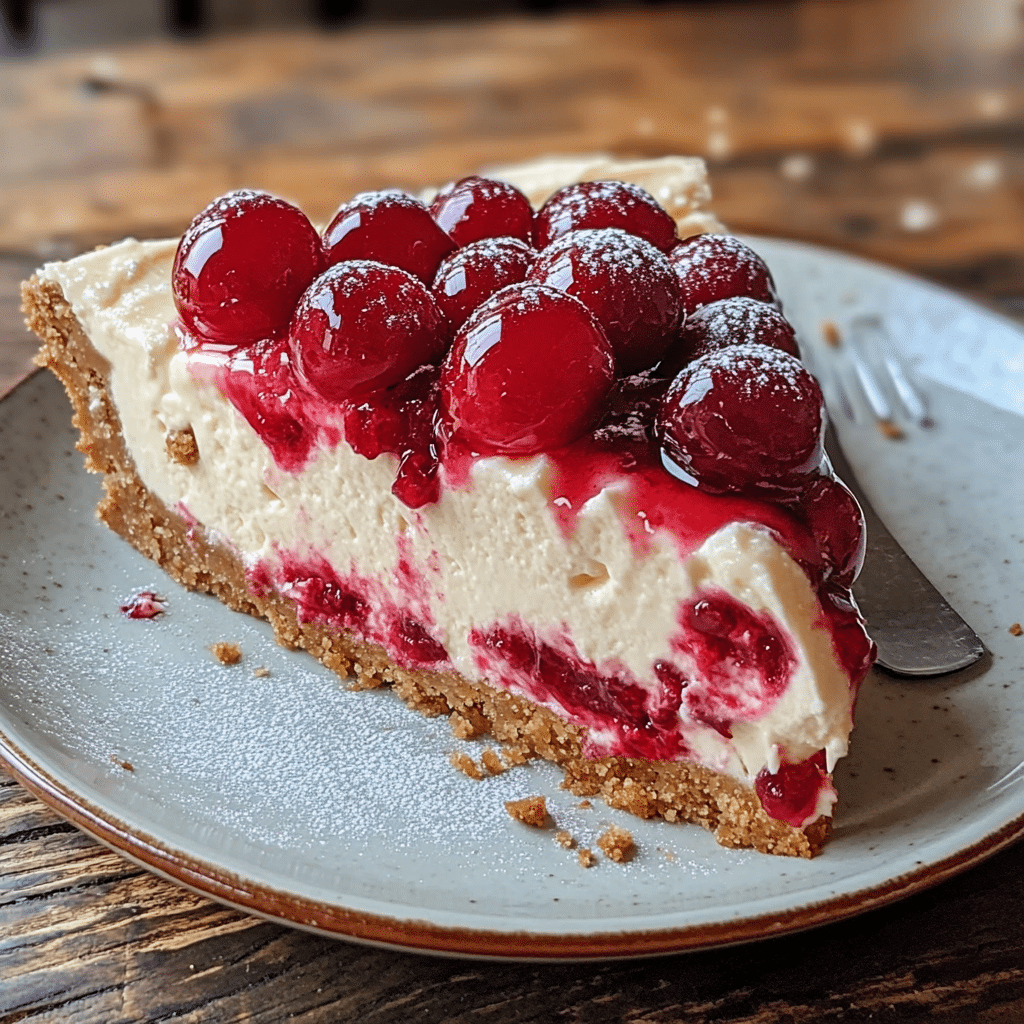
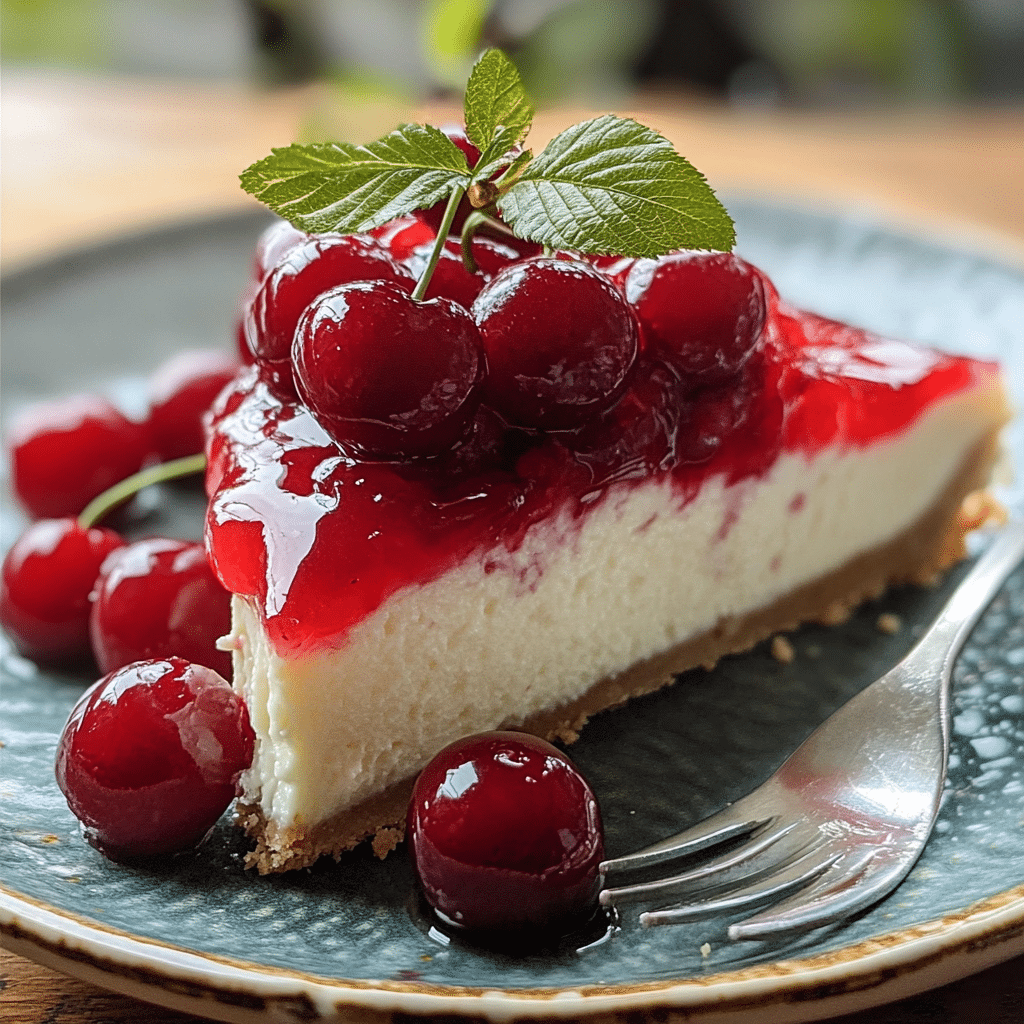
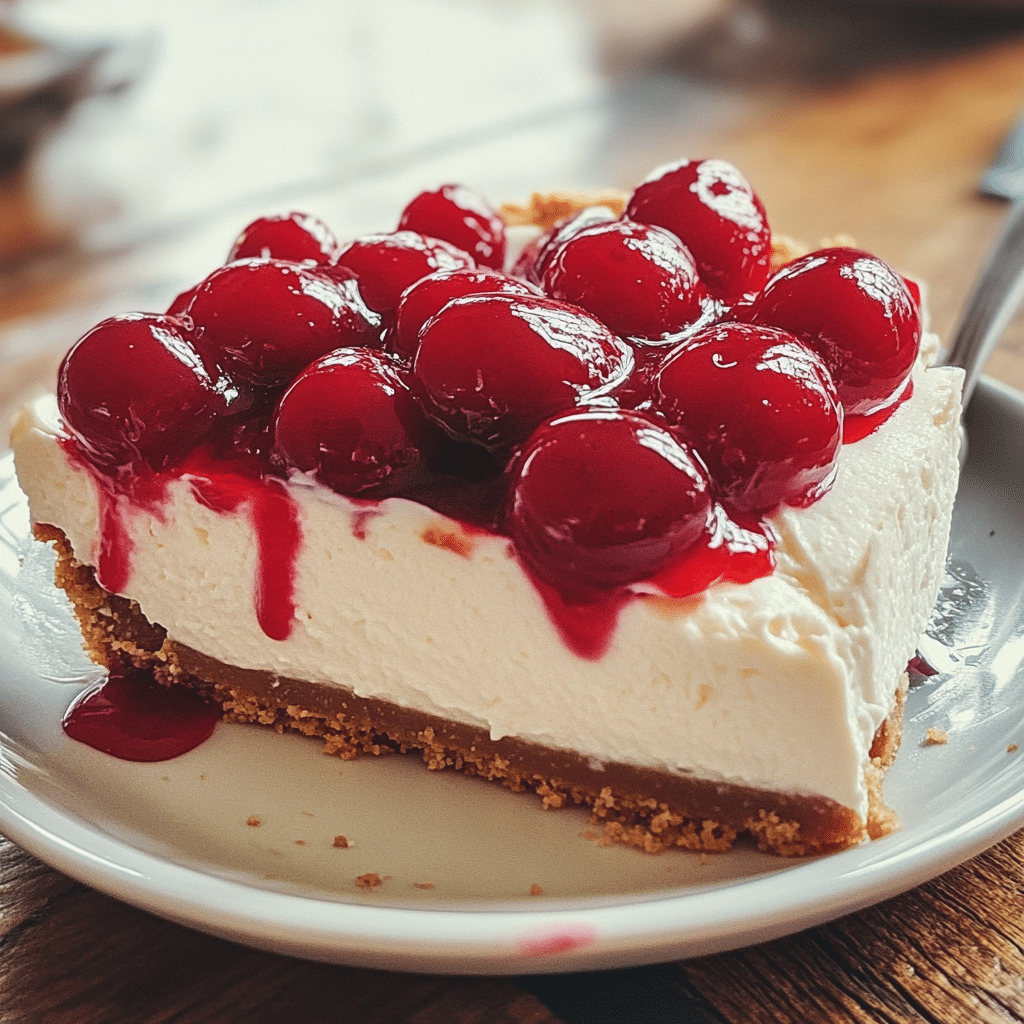
If you love cheesecake but prefer a no-bake, easier-to-make version, then the Cherry Cheesecake Lush is the perfect dessert for you. This irresistible layered dessert combines the rich, creamy flavor of cheesecake with a crunchy, buttery Oreo crust, topped off with a sweet cherry pie filling. It’s a dessert that offers a little bit of everything: creamy, crunchy, tangy, and sweet. With the added texture from the crushed Oreos and the delicious burst of cherry topping, it’s impossible to stop at just one bite.
Perfect for any celebration or family gathering, this Cherry Cheesecake Lush is both visually stunning and mouthwatering. The best part? It’s simple to prepare and can be made in advance, allowing you to spend more time enjoying your guests and less time in the kitchen. Whether you’re making it for a holiday, birthday, or just a treat for yourself, this dessert is sure to be a hit!
Why You’ll Love This Recipe
1. No-Bake Convenience
This dessert is simple and quick to make, with no baking required. It’s perfect for those hot summer days or when you want a fuss-free treat.
2. Creamy Cheesecake Layers
The creamy cheesecake filling is rich and smooth, offering all the indulgent flavor of traditional cheesecake, but without the time and effort.
3. Irresistible Cherry Topping
The tart cherry pie filling adds a beautiful burst of flavor and color that perfectly complements the creamy layers and crunchy crust.
4. Make-Ahead Friendly
This dessert can be prepared in advance and stored in the fridge, making it an ideal option for meal prep or stress-free entertaining.
5. Versatile and Customizable
Feel free to swap out the cherry pie filling for other fruit toppings like blueberry, strawberry, or raspberry for a different twist on this dessert.
Ingredients
For the Crust:
- Golden Oreos (crushed)
- Salted butter (melted)
- Butter (for preparing the pan)
For the Cheesecake Layers:
- Cream cheese (softened)
- White sugar
- Frozen whipped topping (thawed, divided use)
- Cheesecake-flavored instant pudding mix (2 small boxes)
- Whole milk
For the Topping:
- Cherry pie filling (large cans)
- Chopped pecans or walnuts (for topping)
Variations
- Fruit Variations: Swap the cherry pie filling with other fruit fillings like blueberry, strawberry, or peach for a different flavor profile.
- Nuts: You can substitute the chopped pecans or walnuts with slivered almonds, hazelnuts, or leave them out entirely for a nut-free option.
- Chocolate Twist: Add a layer of chocolate chips or drizzle melted chocolate on top for a chocolatey twist.
- Gluten-Free: Use gluten-free cookies for the crust if you want to make this dessert gluten-free.
How to Make the Recipe
Step 1: Prepare the Pan
Start by greasing a 9×13-inch baking dish with butter to prevent the dessert from sticking. Set aside.
Step 2: Make the Crust
In a food processor, crush the Golden Oreos until fine crumbs form. Add the melted butter to the crumbs and stir until the mixture is evenly coated. Press this mixture firmly into the bottom of the prepared pan to form a crust.
Step 3: Prepare the Cheesecake Layers
In a large mixing bowl, beat the softened cream cheese and white sugar together until smooth and creamy. Add in one-half of the thawed whipped topping and mix until well combined.
In a separate bowl, whisk together the cheesecake-flavored instant pudding mix and whole milk for 2 minutes, or until it thickens. Gently fold this pudding mixture into the cream cheese mixture, followed by the remaining whipped topping. Spread the cheesecake filling evenly over the crust.
Step 4: Add the Cherry Topping
Evenly spread the cherry pie filling over the cheesecake layer. Use a spoon to gently spread it out so that the filling covers the entire surface.
Step 5: Add the Toppings
Sprinkle the chopped pecans or walnuts on top of the cherry layer for added crunch and flavor. This step is optional but adds a great texture contrast to the creamy and fruity layers.
Step 6: Chill the Dessert
Cover the dessert with plastic wrap and refrigerate for at least 4 hours or overnight to allow the layers to set properly.
Step 7: Serve and Enjoy
Once the dessert has set, slice into squares or spoon into bowls. Serve chilled for the best texture and flavor.
Tips for Making the Recipe
- Let the Cream Cheese Soften: Make sure your cream cheese is softened to room temperature before mixing, so it blends more easily and results in a smooth filling.
- Don’t Overmix the Pudding: When mixing the pudding with the milk, don’t overmix. Just whisk for the recommended time to prevent the pudding from becoming too thick.
- Chill Thoroughly: Allow the dessert to chill for several hours or overnight for the layers to firm up properly and to enhance the flavor.
- Top with Fresh Fruit: For a fresh twist, consider adding fresh berries on top just before serving, alongside the pie filling.
How to Serve
This Cherry Cheesecake Lush is perfect served on its own as a dessert, but it also pairs beautifully with a cold glass of milk or iced tea. If you want to elevate the dessert further, add a dollop of extra whipped cream or some fresh berries for a colorful garnish.
Make Ahead and Storage
Storing Leftovers
Store any leftover Cherry Cheesecake Lush in an airtight container in the refrigerator for up to 3-4 days. The dessert keeps well and becomes even more flavorful as it sits.
Freezing
While this dessert is best enjoyed fresh, you can freeze the cheesecake lush in an airtight container for up to 1 month. Thaw it in the fridge overnight before serving.
Reheating
This is a no-bake dessert, so it does not require reheating. Just serve chilled straight from the fridge.
FAQs
1. Can I use regular Oreos instead of Golden Oreos?
Yes, regular Oreos can be used, but they will give the crust a slightly different flavor. Golden Oreos tend to blend better with the creamy cheesecake layers.
2. Can I make this dessert without whipped topping?
Yes, you can substitute whipped topping with homemade whipped cream, but it will change the texture slightly. Be sure to stabilize the whipped cream if needed.
3. Can I use low-fat cream cheese?
Yes, you can use low-fat cream cheese, but keep in mind that the texture and richness of the dessert may be slightly altered.
4. Can I make this in advance?
Absolutely! This dessert actually tastes better after it has had time to chill and set, so making it a day in advance is highly recommended.
5. Can I use a different pie filling?
Yes, feel free to use any fruit pie filling of your choice, such as blueberry, peach, or strawberry, for a different flavor.
6. Can I make this gluten-free?
Yes, just substitute the Golden Oreos with a gluten-free cookie option to make this dessert gluten-free.
7. How many servings does this recipe make?
This recipe serves about 12-15 people, depending on portion sizes.
8. Can I add extra layers to the dessert?
Yes, you can add an additional layer of fruit, chocolate, or even a sprinkle of graham cracker crumbs for extra flavor and texture.
9. Can I freeze this dessert?
Yes, you can freeze the Cherry Cheesecake Lush. Just be sure to wrap it tightly in plastic wrap and store it in an airtight container.
10. How long does it take to chill?
Allow the dessert to chill for at least 4 hours, but for the best results, let it sit in the fridge overnight.
Conclusion
Cherry Cheesecake Lush is a showstopper dessert that’s as easy to make as it is delicious. With its creamy, rich layers, crunchy Oreo crust, and sweet cherry topping, it’s a dessert that will impress anyone who tastes it. Whether for a special occasion or just a sweet treat, this dessert is sure to become a family favorite. Prepare it in advance, and enjoy the compliments that are sure to come your way!
Related Posts:
- Italian Cherry Almond Cookies (Dairy-Free & Gluten-Free)
- No-Bake Berry Cheesecake
- White Chocolate Raspberry Cheesecake Bars
Cherry Cheesecake Lush: A Creamy, Dreamy Dessert
- Total Time: 3 hours (includes chilling)
- Yield: About 12 servings 1x
Description
This Cherry Cheesecake Lush is a layered dessert that brings together a buttery golden Oreo crust, a creamy cheesecake filling, and a sweet cherry topping. With a no-bake filling made from cream cheese, whipped topping, and instant pudding mix, this dessert is easy to make but feels indulgent and impressive. Perfect for potlucks, family gatherings, or a sweet treat any time!
Ingredients
For the Crust:
- 1 package golden Oreos (14 oz), crushed in a food processor
- 1/3 cup salted butter, melted
- 1 tbsp butter (for preparing the pan)
For the Filling:
- 8 oz cream cheese, softened to room temperature
- 3/4 cup white sugar
- 16 oz frozen whipped topping, thawed (divided use)
- 2 packages cheesecake flavored instant pudding mix (small boxes)
- 3 cups whole milk
For the Topping:
- 2 cans cherry pie filling (large cans)
- 1 cup chopped pecans or walnuts (optional)
Instructions
- Prepare the crust: In a medium bowl, combine the crushed Oreos and melted butter until the crumbs are fully coated. Use the tablespoon of butter to grease a 9×13-inch baking dish. Press the Oreo mixture into the bottom of the dish to form a firm crust. Place it in the refrigerator to set while preparing the filling.
- Make the filling: In a large mixing bowl, beat the softened cream cheese and white sugar until smooth and creamy. Add the cheesecake-flavored instant pudding mix and whole milk, and continue mixing until the mixture thickens (about 3-5 minutes). Gently fold in 1/2 of the thawed whipped topping until fully incorporated.
- Layer the dessert: Spread the cheesecake filling evenly over the prepared Oreo crust. Use a spatula to smooth the top.
- Add the topping: Spoon the cherry pie filling evenly over the cheesecake layer. If desired, sprinkle with chopped pecans or walnuts for added crunch and flavor.
- Chill the dessert: Refrigerate for at least 3-4 hours or overnight to allow the layers to set. The dessert will be easier to slice after it has chilled.
- Serve: Once set, slice into squares and serve chilled.
Notes
- If you don’t have cheesecake-flavored pudding mix, you can substitute with vanilla pudding mix, but the flavor will be slightly different.
- This dessert can also be topped with other fruits like blueberries, strawberries, or raspberries for variety.
- If you prefer a nuttier topping, feel free to toast the pecans or walnuts lightly before sprinkling them over the cherry topping.
- Prep Time: 20 minutes
- Cook Time: No baking required
- Category: Dessert
- Method: No-bake
- Cuisine: American
Keywords: Cherry Cheesecake, cheesecake lush, cherry dessert, no-bake dessert, easy cheesecake, Oreo crust, cherry pie filling