
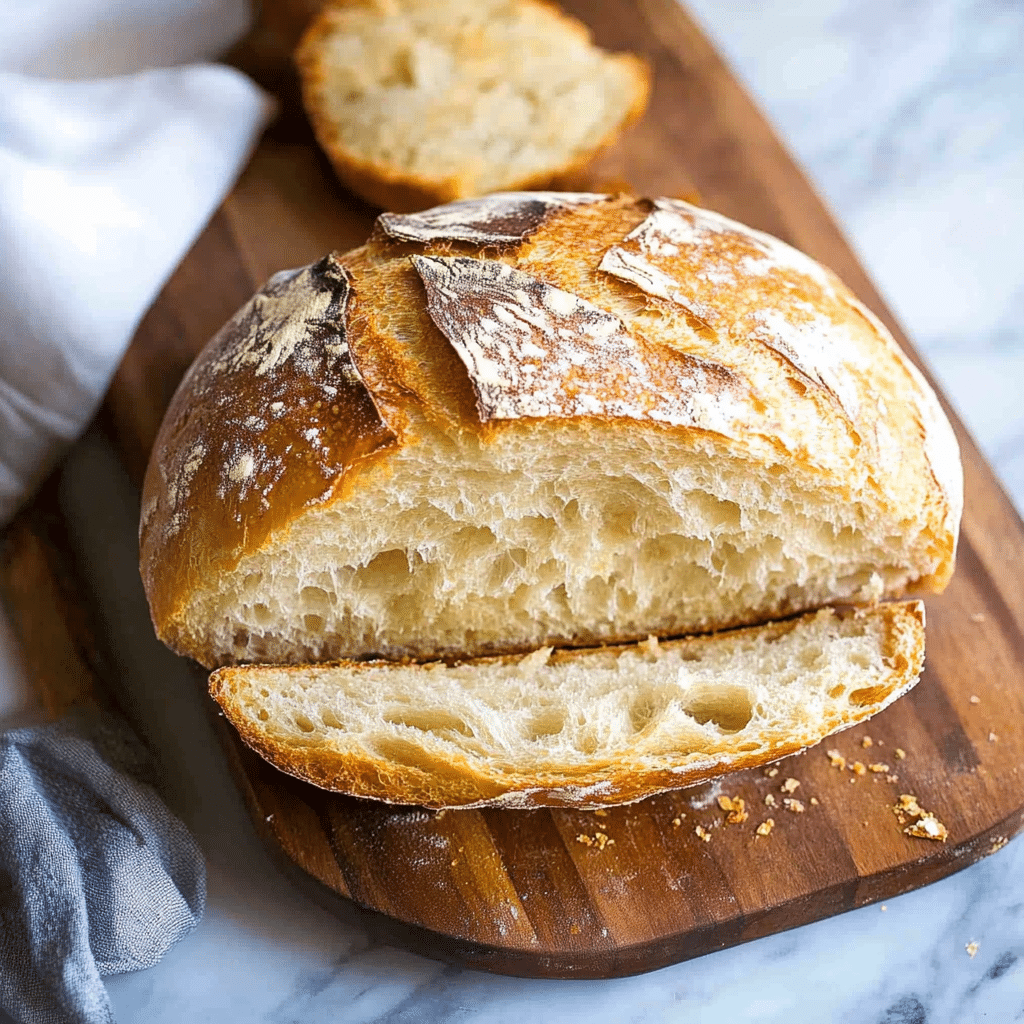
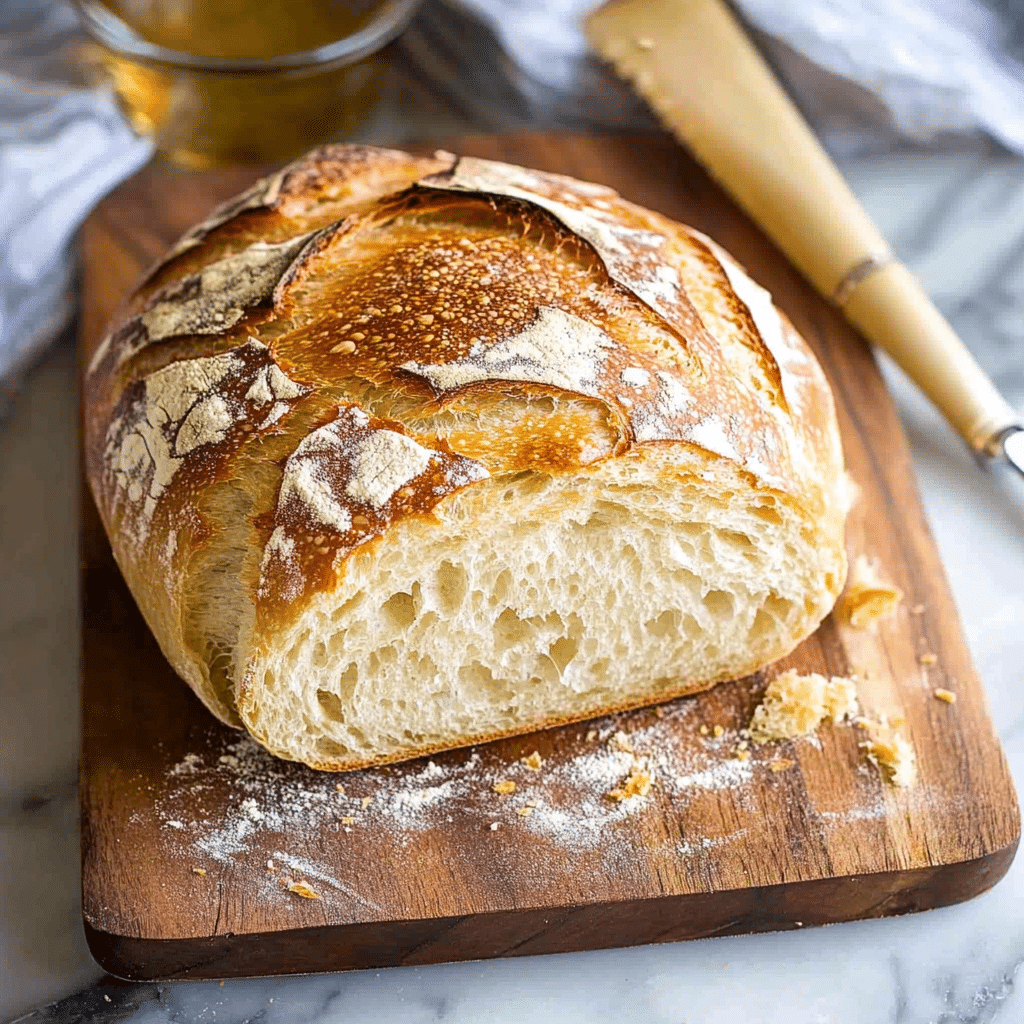
There’s something magical about homemade artisan bread, especially when it’s incredibly easy to make. The Best No Knead Artisan Bread Recipe delivers a perfectly crispy crust and a soft, airy interior with minimal effort. As the name suggests, this recipe requires no kneading, making it an excellent choice for beginner bakers or anyone who wants to enjoy freshly baked bread without the hassle. With just four simple ingredients—flour, salt, yeast, and water—you can create a rustic, flavorful loaf that’s perfect for any meal. The key to this recipe is the long fermentation process, which enhances the bread’s flavor and texture, allowing the yeast to work its magic over time. Whether you enjoy it fresh out of the oven or as the base for sandwiches, this no-knead bread will surely become a household favorite.
Why You’ll Love This Recipe
1. No Kneading Required
The best part of this recipe is that there’s no kneading involved. Simply mix the ingredients together and let the dough rise, making it perfect for anyone looking to save time and effort while still enjoying homemade bread.

2. Simple Ingredients
This bread uses just four basic ingredients—flour, yeast, salt, and water—making it simple and budget-friendly without compromising on flavor.
3. Minimal Hands-On Time
Most of the work is done during the long fermentation process. This means you can set the dough aside and go about your day while it slowly rises and develops flavor.
4. Amazing Flavor
The long resting period allows the dough to develop a deep, rich flavor. The result is a bread that’s slightly tangy with a chewy interior and crispy crust, just like artisan bread you’d find in a bakery.
5. Perfect for Beginners
No kneading and minimal steps make this an excellent recipe for beginner bakers. The simplicity of the method ensures that even first-time bread makers can bake a beautiful loaf.
Ingredients
For the No Knead Artisan Bread:
- All-purpose flour
- Coarse sea salt
- Active dry yeast (or instant yeast)
- Warm water
Variations
- Herb-Infused Bread: Add dried herbs such as rosemary, thyme, or oregano to the dough for a fragrant twist.
- Seeded Artisan Bread: Mix in sunflower seeds, flaxseeds, or sesame seeds to the dough for extra crunch and flavor.
- Garlic Bread: Incorporate minced garlic and a touch of olive oil into the dough for a savory variation.
- Whole Wheat Artisan Bread: Swap half of the all-purpose flour with whole wheat flour for a slightly denser and healthier loaf.
How to Make the Recipe
Step 1: Combine Dry Ingredients
In a large mixing bowl, combine the all-purpose flour, coarse sea salt, and active dry yeast. Stir them together to evenly distribute the yeast and salt throughout the flour.
Step 2: Add Water
Add the warm water (about 110°F) to the dry ingredients. Stir until a rough dough forms, making sure all of the flour is incorporated into the mixture. The dough should be sticky and shaggy.
Step 3: Let the Dough Rise
Cover the bowl with a clean kitchen towel or plastic wrap and set it aside in a warm place to rise for 12 to 18 hours. During this time, the dough will expand and become more flavorful. Allow the dough to rise until it has doubled in size and the surface is bubbly.
Step 4: Shape the Dough
Once the dough has risen, turn it out onto a well-floured surface. Gently fold the dough in on itself a few times to form a rough ball. Be careful not to deflate the dough too much—this helps preserve the air bubbles that contribute to its airy texture.
Step 5: Second Rise
Place the shaped dough onto a piece of parchment paper and cover it with a towel. Let it rise for another 1-2 hours, or until it has puffed up again. While the dough is resting, preheat your oven to 450°F (230°C) and place a Dutch oven or heavy pot inside to preheat as well.
Step 6: Bake the Bread
Once the dough has finished its second rise, carefully remove the hot Dutch oven from the oven and place the dough (with the parchment paper) inside. Cover the pot with the lid and bake for 30 minutes. After 30 minutes, remove the lid and continue baking for an additional 15-20 minutes, or until the crust is golden brown and the loaf sounds hollow when tapped on the bottom.
Step 7: Cool and Serve
Remove the bread from the oven and transfer it to a wire rack to cool completely. Allow the bread to cool for at least an hour before slicing to ensure the crumb sets properly.
Tips for Making the Recipe
- Use Room Temperature Water: Ensure the water you use to mix the dough is warm, around 110°F, but not too hot. Too much heat can kill the yeast.
- Don’t Rush the Rise: The dough needs time to develop its flavor. Be sure to let it rise for the full 12-18 hours to get the best results.
- Use a Dutch Oven: A Dutch oven helps create steam while baking, which gives the bread its signature crispy crust. If you don’t have a Dutch oven, you can use a heavy pot with a lid or bake it directly on a baking stone.
- Preheat the Pot: Make sure the Dutch oven is preheated in the oven before you bake the bread to ensure a hot, even bake.
- Don’t Overwork the Dough: When shaping the dough, handle it gently to preserve the air bubbles. Overworking the dough can result in a denser loaf.
How to Serve
This artisan bread is perfect for a variety of occasions. Serve it with butter or olive oil for a simple, satisfying snack, or pair it with soups, stews, or salads. It’s also great for making sandwiches, particularly with your favorite cheeses, deli meats, or roasted vegetables.
Make Ahead and Storage
Storing Leftovers
Once the bread has cooled completely, store it in a paper bag or bread box at room temperature for up to 3 days. For longer storage, wrap it tightly in plastic wrap and place it in an airtight container.
Freezing
You can freeze the loaf by wrapping it tightly in plastic wrap and placing it in a freezer-safe bag. To thaw, remove the bread from the freezer and let it come to room temperature, or heat it in the oven at 350°F (175°C) for about 10-15 minutes.
Reheating
To reheat the bread, wrap it in foil and bake it at 350°F (175°C) for 10-15 minutes, or slice it and toast the pieces in the toaster.
FAQs
1. Can I use instant yeast instead of active dry yeast?
Yes, you can use instant yeast in place of active dry yeast. There’s no need to proof it in water beforehand; just mix it directly with the flour.
2. What if I don’t have a Dutch oven?
If you don’t have a Dutch oven, you can bake the bread on a baking sheet or a baking stone. Just make sure to place a pan of water in the oven to create steam, which will help form the crust.
3. Can I make this bread without a preheating pot?
Preheating the pot helps ensure an even bake and a crispy crust, but if you don’t preheat it, you can still bake the bread. Just be aware that it may not be as crispy.
4. How do I know when the bread is done?
The bread is done when it has a deep golden-brown crust and sounds hollow when tapped on the bottom. You can also check the internal temperature—it should reach 200°F (93°C).
5. How long can I store this bread?
This bread can be stored for up to 3 days at room temperature in a paper bag or bread box. After that, it may start to dry out, but you can refresh it by reheating it in the oven.
6. Can I use whole wheat flour in this recipe?
Yes, you can substitute part of the all-purpose flour with whole wheat flour. Keep in mind that whole wheat flour may result in a denser texture, so you may need to adjust the water slightly.
7. Can I add extra ingredients like cheese or olives?
Yes, feel free to add any additional ingredients like shredded cheese, olives, or herbs during the mixing process for added flavor.
8. Why is my bread not rising?
If your dough isn’t rising, it could be due to expired yeast, a cold environment, or not enough time. Ensure the yeast is active and give the dough more time to rise.
9. Can I make this bread in a bread machine?
This recipe is designed for hand mixing and no-knead techniques. A bread machine might not give you the same result, as it may knead the dough and bake it differently.
10. Can I use a different type of flour?
You can experiment with other types of flour, but keep in mind that different flours will affect the texture and flavor. Bread flour or whole wheat flour will change the bread’s structure, so adjust the hydration and baking time accordingly.
Conclusion
This Best No Knead Artisan Bread Recipe is a must-try for anyone who loves fresh, homemade bread. With minimal hands-on time and just a few basic ingredients, you can create a rustic, flavorful loaf with a crisp crust and soft interior. Whether you’re new to bread-making or an experienced baker, this simple recipe guarantees delicious results every time.
Print
Best No Knead Artisan Bread Recipe
- Total Time: 12-18 hours (including rising time)
- Yield: 1 loaf 1x
Description
This no-knead artisan bread is simple, flavorful, and perfect for beginners. With just a few ingredients and minimal effort, you can enjoy a crusty, chewy loaf of homemade bread with a golden, crispy exterior and soft, airy interior.
Ingredients
- 3 cups all-purpose flour
- 2 teaspoons coarse sea salt
- ½ teaspoon active dry yeast (or instant yeast)
- 1 ½ cups warm water (about 110°F or 43°C)
Instructions
-
Mix the Dough:
In a large bowl, whisk together the flour, salt, and yeast. Pour in the warm water and stir with a wooden spoon or your hands until a shaggy dough forms. The dough will be sticky and wet, which is perfectly normal for no-knead bread. -
First Rise:
Cover the bowl with plastic wrap or a clean kitchen towel. Let the dough rise at room temperature for 12-18 hours, or until it has doubled in size and is bubbly. -
Preheat the Oven:
About 30 minutes before you’re ready to bake, place a Dutch oven or heavy pot with a lid into the oven and preheat to 450°F (230°C). Let the pot heat up for at least 30 minutes to ensure it is hot enough to create a crispy crust. -
Shape the Dough:
After the dough has finished rising, turn it out onto a lightly floured surface. Gently fold it into a ball, being careful not to deflate it too much. You don’t need to knead the dough—just fold it over itself a couple of times to shape it. -
Second Rise:
Let the dough rest for about 30 minutes while the pot preheats. -
Bake the Bread:
Once the oven and pot are preheated, carefully transfer the dough into the hot pot. You can line the bottom of the pot with parchment paper for easier removal later. Cover the pot with the lid and bake for 30 minutes. After 30 minutes, remove the lid and continue baking for an additional 15-20 minutes, or until the bread is golden brown and sounds hollow when tapped on the bottom. -
Cool and Serve:
Let the bread cool on a wire rack for at least 30 minutes before slicing. This ensures the texture sets properly.
Notes
- For a different flavor, you can add herbs, garlic, or seeds to the dough before the first rise.
- Make sure the water is warm but not too hot, as water above 120°F (49°C) can kill the yeast.
- This bread can be made ahead and stored for a couple of days. It actually gets even better after resting for a day or two.
- Prep Time: 5 minutes (plus rising time)
- Cook Time: 45-50 minutes
- Category: Breads
- Method: Baking
- Cuisine: American
Keywords: No Knead Bread, Artisan Bread, Easy No Knead Bread, Homemade Artisan Bread, Simple Bread Recipe, Crusty Bread