
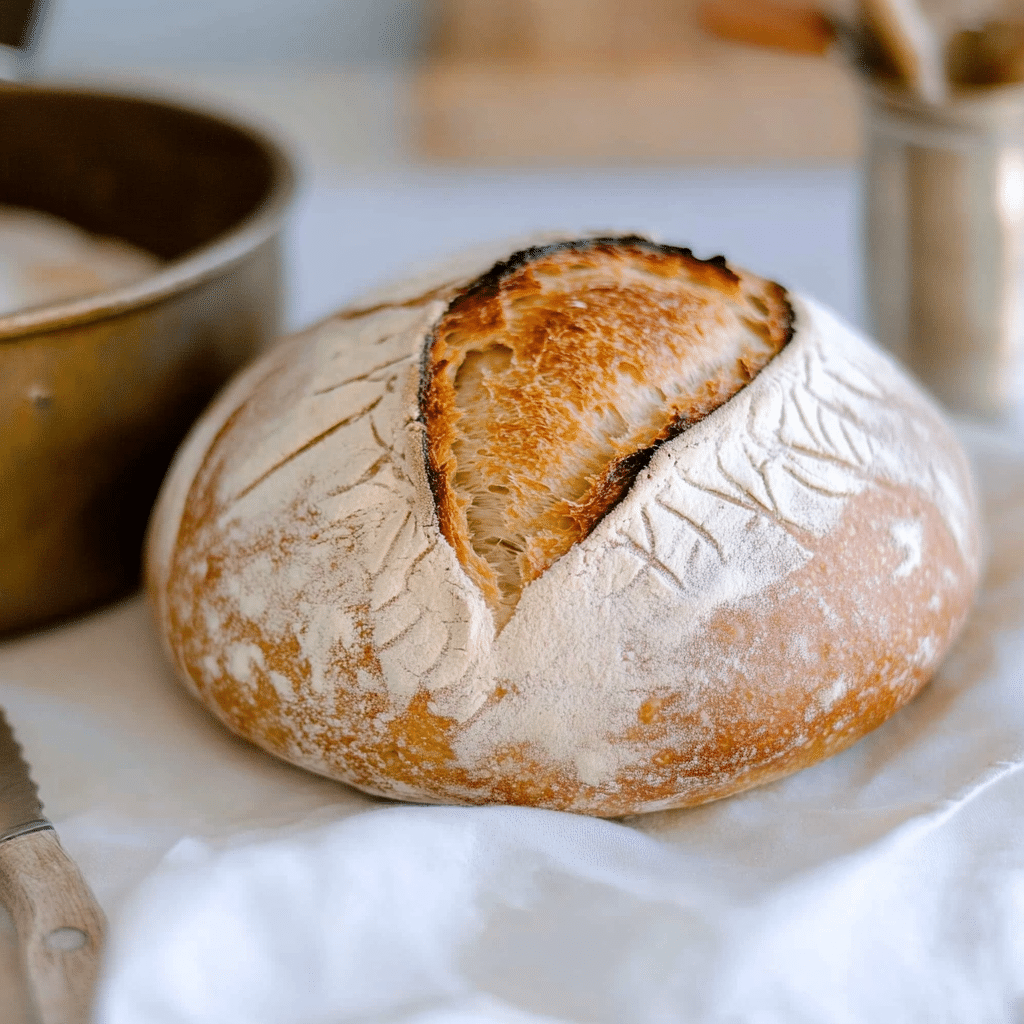
Sourdough bread is a timeless classic, known for its distinct tangy flavor and crusty exterior. Despite the long process involved in creating a true sourdough loaf, making it from scratch doesn’t have to be intimidating, especially with this beginner-friendly sourdough bread recipe. The natural fermentation process using a starter gives this bread its signature depth of flavor and chewy texture. Whether you’re a first-time baker or someone looking to perfect your sourdough technique, this simple recipe will guide you through the steps to bake a delicious homemade loaf. With just a few ingredients, some patience, and the magic of time, you can enjoy the satisfaction of baking your very own sourdough bread.
Why You’ll Love This Recipe
1. Simple Ingredients
This recipe uses just a handful of basic ingredients—flour, water, salt, and a sourdough starter—that you likely already have or can easily obtain. It’s a great entry point into the world of bread-making.

2. Tangy and Flavorful
The fermentation process brings out that signature sourdough tang that you can’t get from any other type of bread. The longer the dough rises, the more complex and flavorful it becomes.
3. Chewy and Rustic Texture
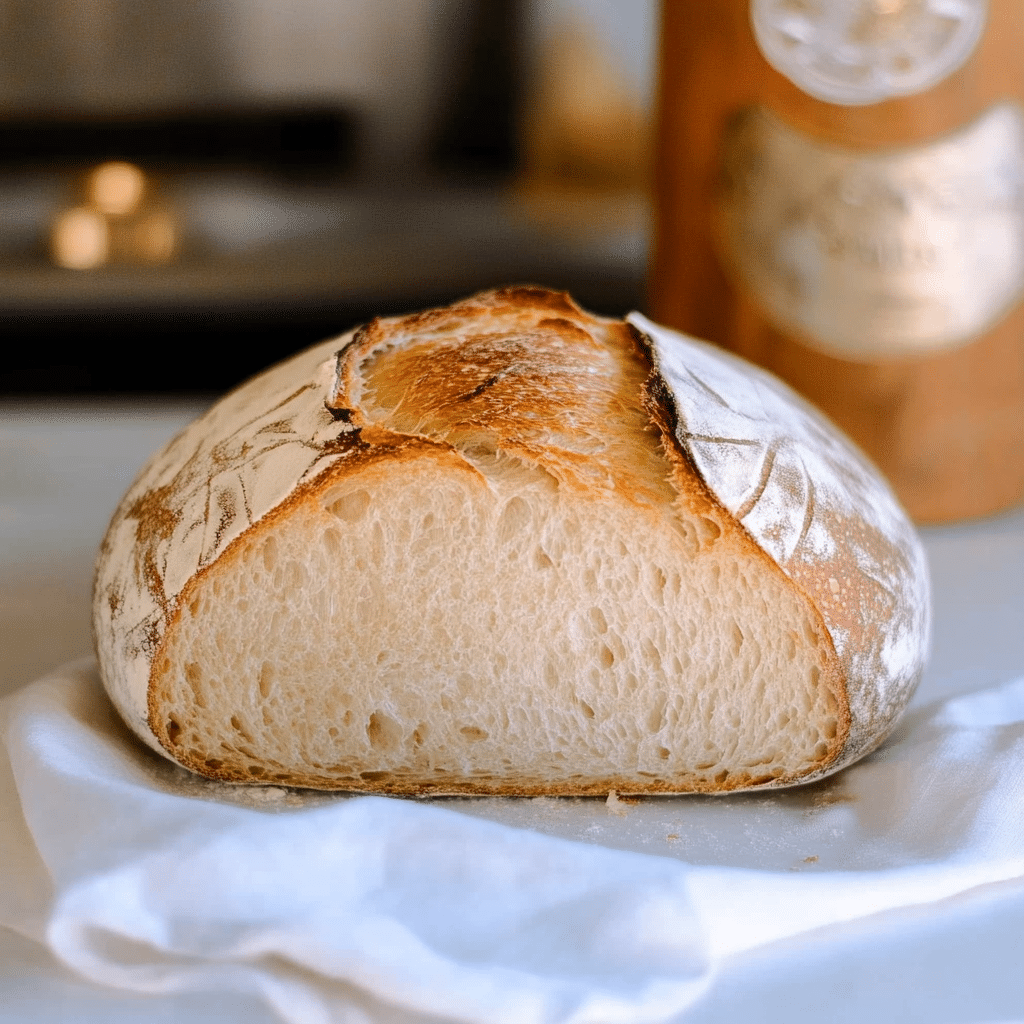
Sourdough is known for its chewy texture and crunchy crust. This recipe delivers both, resulting in a bread that’s perfect for toasts, sandwiches, or simply enjoying with a smear of butter.
4. Natural Leavening
Instead of using commercial yeast, this recipe relies on a natural sourdough starter. The wild yeast and bacteria in the starter work together to rise the dough, creating a healthier and more flavorful loaf.
5. Great for Beginners
While sourdough may seem complicated, this recipe is designed for beginners. With clear instructions and a manageable timeline, you’ll be able to bake your first sourdough loaf with confidence.
Ingredients
For the Sourdough Bread:
- All-purpose flour
- Active and bubbly sourdough starter
- Water
- Salt
Variations
- Whole Wheat Sourdough: You can substitute half of the all-purpose flour with whole wheat flour for a heartier loaf with a slightly nutty flavor.
- Seeded Sourdough: Add sunflower seeds, pumpkin seeds, or sesame seeds into the dough for a delicious crunchy texture.
- Herbed Sourdough: For an aromatic twist, add herbs like rosemary, thyme, or oregano to the dough before the final rise.
- Sweet Sourdough: Add a tablespoon of honey or sugar to the dough for a slightly sweeter version of sourdough bread.
How to Make the Recipe
Step 1: Mix the Dough
In a large mixing bowl, combine the all-purpose flour, sourdough starter, and water. Stir with a wooden spoon or your hands until the ingredients come together to form a shaggy dough. Add the salt and mix it in until evenly distributed.
Step 2: Autolyse
Allow the dough to rest for about 30 minutes to an hour. This step helps the flour fully absorb the water and gives the dough time to relax, making it easier to handle in the next steps.
Step 3: Knead the Dough
After the autolyse period, knead the dough for about 5-7 minutes. You can do this on a floured surface or in the bowl. The dough should be slightly sticky but smooth and elastic when done.
Step 4: Bulk Fermentation
Cover the bowl with a clean kitchen towel or plastic wrap and let the dough rise at room temperature for 4-6 hours. During this time, the dough will begin to ferment. Every 30 minutes for the first 2 hours, perform a series of “stretch and folds” to develop the dough’s strength. Simply grab a portion of the dough, stretch it upward, and fold it back over itself. Rotate the bowl and repeat until the dough has been folded in all directions.
Step 5: Shape the Dough
After the dough has risen and fermented, gently punch it down to release the air. Shape the dough into a round or oval loaf, depending on your preference. If you’re using a proofing basket or bowl, lightly flour the surface to prevent sticking.
Step 6: Second Rise
Place the shaped dough onto a parchment-lined baking sheet or into a proofing basket. Cover the dough and let it rise for another 2-3 hours, or until it has roughly doubled in size.
Step 7: Preheat the Oven
While the dough is completing its second rise, preheat your oven to 450°F (230°C). Place a Dutch oven or a baking stone inside the oven while it’s preheating to ensure it gets hot before you bake the bread.
Step 8: Bake the Bread
Once the dough has finished its second rise, carefully transfer it to the preheated Dutch oven or baking stone. If desired, score the top of the loaf with a sharp knife or razor blade. This allows the bread to expand evenly while baking. Cover the Dutch oven with a lid and bake for 30 minutes. After 30 minutes, remove the lid and continue baking for an additional 15-20 minutes, or until the loaf is golden brown and sounds hollow when tapped on the bottom.
Step 9: Cool and Serve
Remove the bread from the oven and allow it to cool on a wire rack for at least an hour before slicing. This ensures the crumb sets properly and results in a more satisfying texture when sliced.
Tips for Making the Recipe
- Starter Care: Ensure your sourdough starter is active and bubbly before using it. Feed it at least 12 hours before baking for the best results.
- Room Temperature Dough: Let the dough rise at room temperature, ideally between 70°F to 75°F. A cooler environment will slow fermentation, while too much heat can over-ferment the dough.
- Timing the Bulk Fermentation: The length of the bulk fermentation process may vary depending on the temperature of your kitchen and the activity of your starter. Don’t rush it—let the dough rise slowly for better flavor development.
- Use a Dutch Oven: Baking your sourdough in a Dutch oven creates steam, which helps develop a beautiful, crusty exterior. If you don’t have a Dutch oven, you can use a baking stone or a regular baking sheet.
- Don’t Skip the Cooling: Let the bread cool completely before slicing to avoid a gummy texture. The bread needs time for the crumb to set properly.
How to Serve
Fresh sourdough bread is versatile and perfect for a variety of meals. It’s ideal for making sandwiches, especially with ingredients like cheese, ham, or avocado. It also pairs beautifully with soups, stews, or salads, or you can simply enjoy it with a drizzle of olive oil or a spread of butter.
Make Ahead and Storage
Storing Leftovers
Once the bread has cooled completely, store it in a paper bag or a bread box at room temperature for up to 4-5 days. For longer storage, keep it in an airtight container or bag.
Freezing
To freeze, slice the sourdough bread and wrap the slices in plastic wrap or foil. Place the wrapped slices in a freezer-safe bag and store them for up to 3 months. Thaw individual slices in the toaster or on a baking sheet in the oven.
Reheating
Reheat slices of sourdough in the toaster, or for a whole loaf, wrap it in foil and bake it at 350°F (175°C) for about 10-15 minutes.
FAQs
1. Can I use a store-bought sourdough starter?
Yes, you can use a store-bought starter, but it’s essential to make sure it’s active and bubbly. You can also make your own starter at home with just flour and water.
2. Can I make this recipe without a Dutch oven?
Yes, you can bake it on a baking sheet or a stone, though a Dutch oven helps create steam for a better crust.
3. How long does it take to make sourdough bread?
From start to finish, the process usually takes around 8-10 hours, but most of that time is spent waiting for the dough to rise. Active baking time is about 1-2 hours.
4. How do I know when the bread is done baking?
The bread is done when it is golden brown and sounds hollow when tapped on the bottom. You can also use a thermometer to check; the internal temperature should be about 200°F (93°C).
5. Can I speed up the fermentation process?
While sourdough benefits from slow fermentation, you can try using warmer temperatures (up to 80°F) to speed up the process. Just keep an eye on the dough to avoid over-fermenting.
6. Can I make this recipe gluten-free?
This recipe uses all-purpose flour, but you can experiment with gluten-free flour blends. Keep in mind that the texture and flavor may differ from traditional sourdough.
7. Do I need to feed the starter right before using it?
Yes, for the best results, your sourdough starter should be fed and active. Feed it 12 hours before baking to ensure it’s bubbly and ready to leaven the dough.
8. Can I make the dough the night before?
Yes, you can prepare the dough the night before and let it rise slowly in the fridge overnight. Bring it to room temperature before baking the next day.
9. Why is my bread flat?
If your sourdough bread is flat, it might be due to under-proofing or over-proofing. Make sure the dough is given enough time to rise and ferment properly.
10. Can I use this recipe to make rolls instead of a loaf?
Yes, you can shape the dough into smaller portions and bake them as rolls. Just adjust the baking time to around 15-20 minutes.
Conclusion
This Beginner’s Sourdough Bread Recipe is a wonderful introduction to the world of sourdough baking. With just a few basic ingredients, some patience, and a little care, you can bake a beautiful, crusty loaf that’s full of flavor and perfect for a variety of meals. Whether you’re new to sourdough or looking to refine your baking skills, this recipe will help you achieve the perfect loaf every time. Enjoy the process and the delicious results!
Print
Beginner’s Sourdough Bread Recipe
- Total Time: 5-7 hours (including rising time)
- Yield: 1 loaf 1x
Description
This simple and easy-to-follow sourdough bread recipe is perfect for beginners looking to make homemade bread with a natural, tangy flavor. With minimal ingredients and basic techniques, you can enjoy fresh, homemade sourdough straight from your oven.
Ingredients
- 475 grams all-purpose flour (about 3 ½ cups)
- 100 grams active, bubbly sourdough starter (about ½ cup)
- 325 grams water (about 1 ⅓ cups)
- 10 grams salt (about 2 teaspoons)
Instructions
-
Mix the Dough:
In a large bowl, combine the flour and salt. In a separate bowl, mix the active sourdough starter with water. Add the starter mixture to the flour and salt, stirring until all the flour is incorporated into the dough. -
Autolyse:
Let the dough rest for 30 minutes to allow the flour to hydrate fully and begin developing the gluten. -
Knead the Dough:
After the resting period, knead the dough in the bowl for about 5-7 minutes until it becomes smooth and elastic. You can also perform stretch-and-folds if you prefer a no-knead method: stretch the dough and fold it over itself every 30 minutes for about 3-4 hours. -
First Rise:
Transfer the dough to a lightly greased bowl, cover it, and let it rise for 4-6 hours at room temperature, or until it has doubled in size. If you have time, you can let it rise in the fridge overnight for a slower fermentation process and more complex flavors. -
Shape the Dough:
Once the dough has risen, turn it out onto a lightly floured surface. Gently shape it into a round loaf or a batard, depending on your preference. Be careful not to deflate the dough too much. -
Second Rise:
Place the shaped dough into a well-floured proofing basket or a bowl lined with a floured towel. Cover it and let it rise for 1-2 hours at room temperature until it is puffy and slightly risen. -
Preheat the Oven:
Preheat your oven to 450°F (230°C). If you’re using a Dutch oven to bake the bread, place it inside the oven while it preheats. -
Bake the Bread:
Once the oven is hot, carefully transfer the dough to the preheated Dutch oven or a baking sheet. Score the top with a sharp knife or razor blade to help it expand while baking. Cover the Dutch oven with its lid and bake for 20 minutes. After 20 minutes, remove the lid and bake for another 25-30 minutes until the bread has a deep golden-brown crust. -
Cool and Serve:
Allow the bread to cool on a wire rack for at least an hour before slicing to ensure the texture sets properly. Enjoy your homemade sourdough bread!
Notes
- For a more tangy flavor, let the dough rise longer or ferment it in the fridge overnight.
- Ensure your starter is active and bubbly for the best rise and flavor.
- You can experiment with adding seeds, herbs, or other flavorings to the dough before shaping.
- Prep Time: 20 minutes (plus resting/rising time)
- Cook Time: 50 minutes
- Category: Breads
- Method: Baking
- Cuisine: American
Keywords: Sourdough Bread, Beginner’s Sourdough, Homemade Sourdough, Simple Sourdough Recipe, Artisan Bread, Easy Sourdough Bread